
Mesh Gradient Maker
Impact
3,500+ designers are using Mesh Gradient Maker to create animations and backgrounds they couldn't make before. It hit 1,000 users in the first few weeks of launch on the Framer Marketplace, and continues to see ~80 active users per week across three major releases.
This is a live, public product. Designed, built, and shipped entirely by myself.
The Gap I Found
As a designer working daily in Framer, I kept running into the same wall: smooth, animated mesh gradients. The kind you see in Stripe's branding and across modern SaaS UI, but simply weren't achievable without writing shader code from scratch.
I researched what already existed. CSS gradients couldn't animate smoothly between states. Shader Gradients by Yongmin Ruucm and Seungmee Lee was the gold standard in the space, powerful and highly customizable, but complex for designers who just wanted beautiful output fast.
The gap was clear: a focused, approachable mesh gradient tool built specifically for Framer, with a designer-first interface and no coding required.
The Vision
Before writing a line of code, I mapped out exactly what success looked like:
Intuitive color point addition and positioning
Real-time gradient preview
One-click publish to the Framer canvas
Randomisation for quick experimentation
A clean interface that felt native to Framer
Technical foundation: WebGL for performance, React for the UI, and seamless integration with the Framer plugin API.
Building with AI: The Reality
Let me be honest: building with AI wasn't magic. It was messy, iterative, and required constant problem-solving. But it made something possible that would have taken me months (or never happened at all) otherwise.
Phase 1: CSS Experiments
I started by trying to prove my research wrong. Maybe there was a clever CSS trick I'd missed?
I built prototypes using pure CSS with multiple radial-gradient layers, attempting to animate them with transitions and CSS variables. The results were... disappointing. Gradients would snap between states, color transitions looked muddy, and performance tanked with more than a few color stops.
Key learning: Sometimes research is right. CSS wasn't going to work for what I envisioned. Time to move to WebGL.
Phase 2: Making a Framer Component
I started with Claude, describing what I wanted to build:
"Create a react js mesh gradient component."
This was the beginning of a journey that took me down multiple research paths, projects, implementations, and solutions that other creators made.
The AI gave me foundational knowledge about WebGL shaders, basic radial gradient blending logic, and a rendering loop. The first version was rough, but when I saw multiple colored circles bleeding into each other smoothly, I knew the core concept was viable.
Key learning: Start with the hardest technical challenge first. If the WebGL rendering didn't work, nothing else mattered.
My first working version was a Framer code component. It worked, but had a problem: every time you wanted to change a color or adjust positioning, you had to edit code properties.
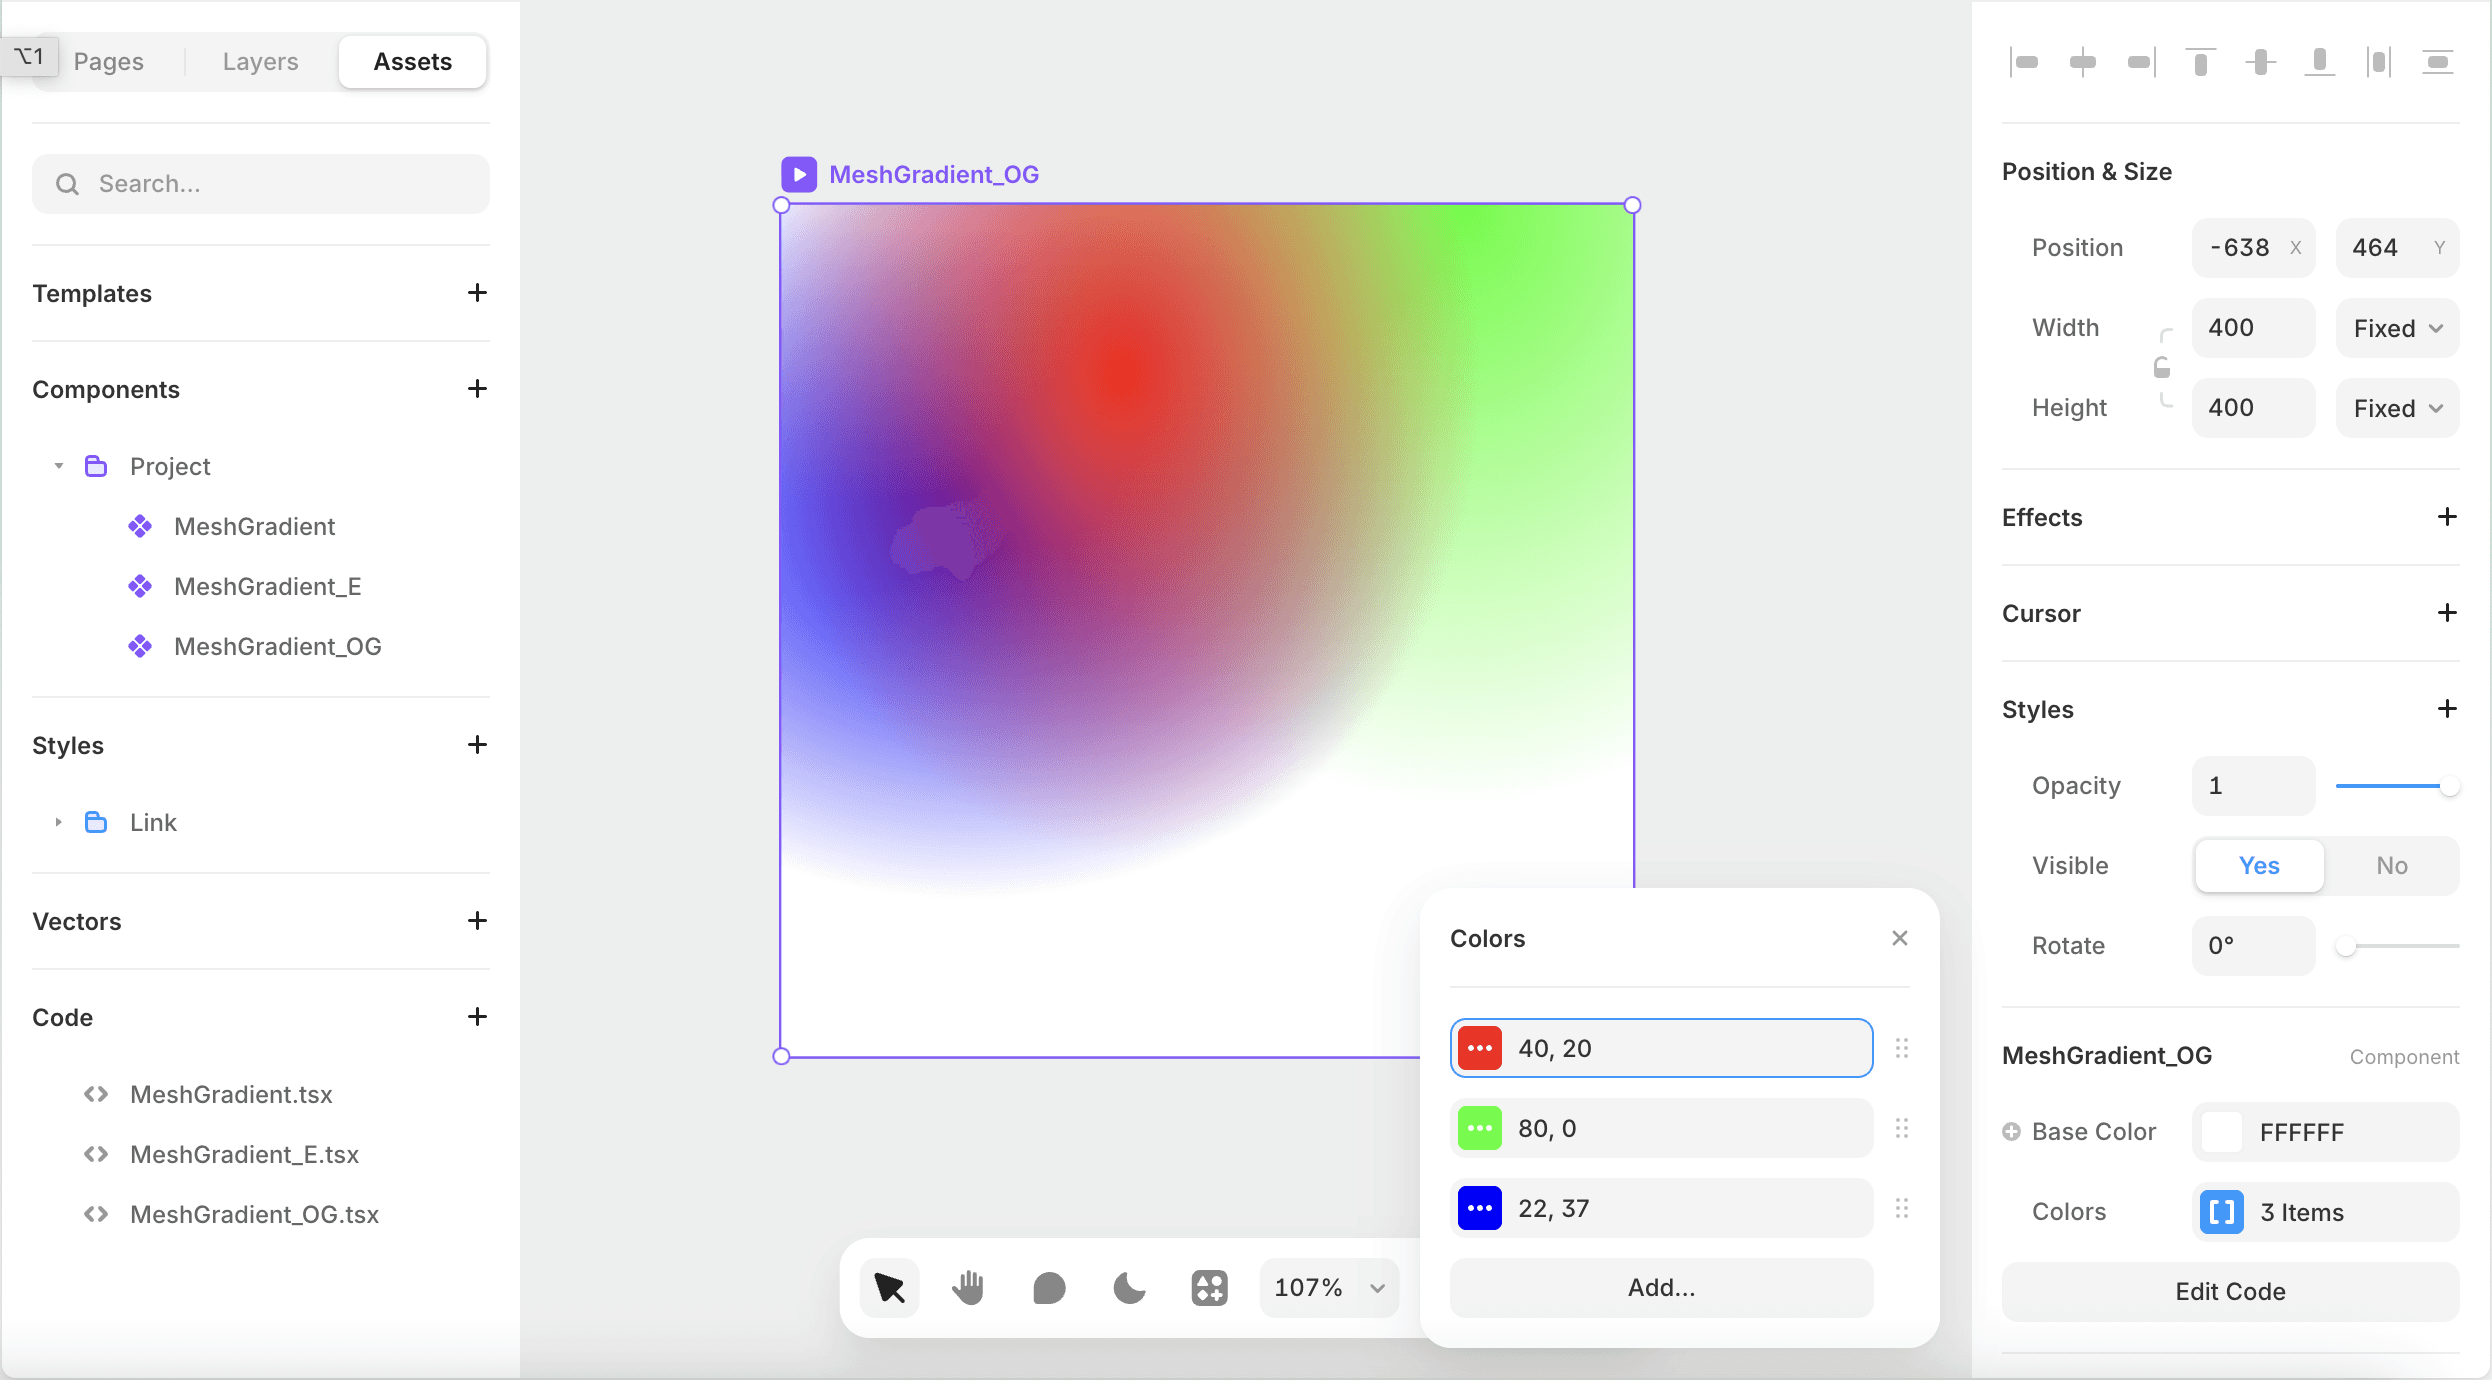
Phase 3: The Framer Plugin Interface
The Framer Code Component on its own was not ideal for designers. This is when I decided to build a plugin interface. Plugins in Framer let you build custom UI panels with controls, live previews, and adding the code component directly to the canvas manipulation. This is perfect for what I needed.
The transition required:
Extracting the WebGL gradient logic into a reusable library
Building a React-based plugin UI with color pickers and position controls
Creating a bridge between the plugin controls and the canvas rendering
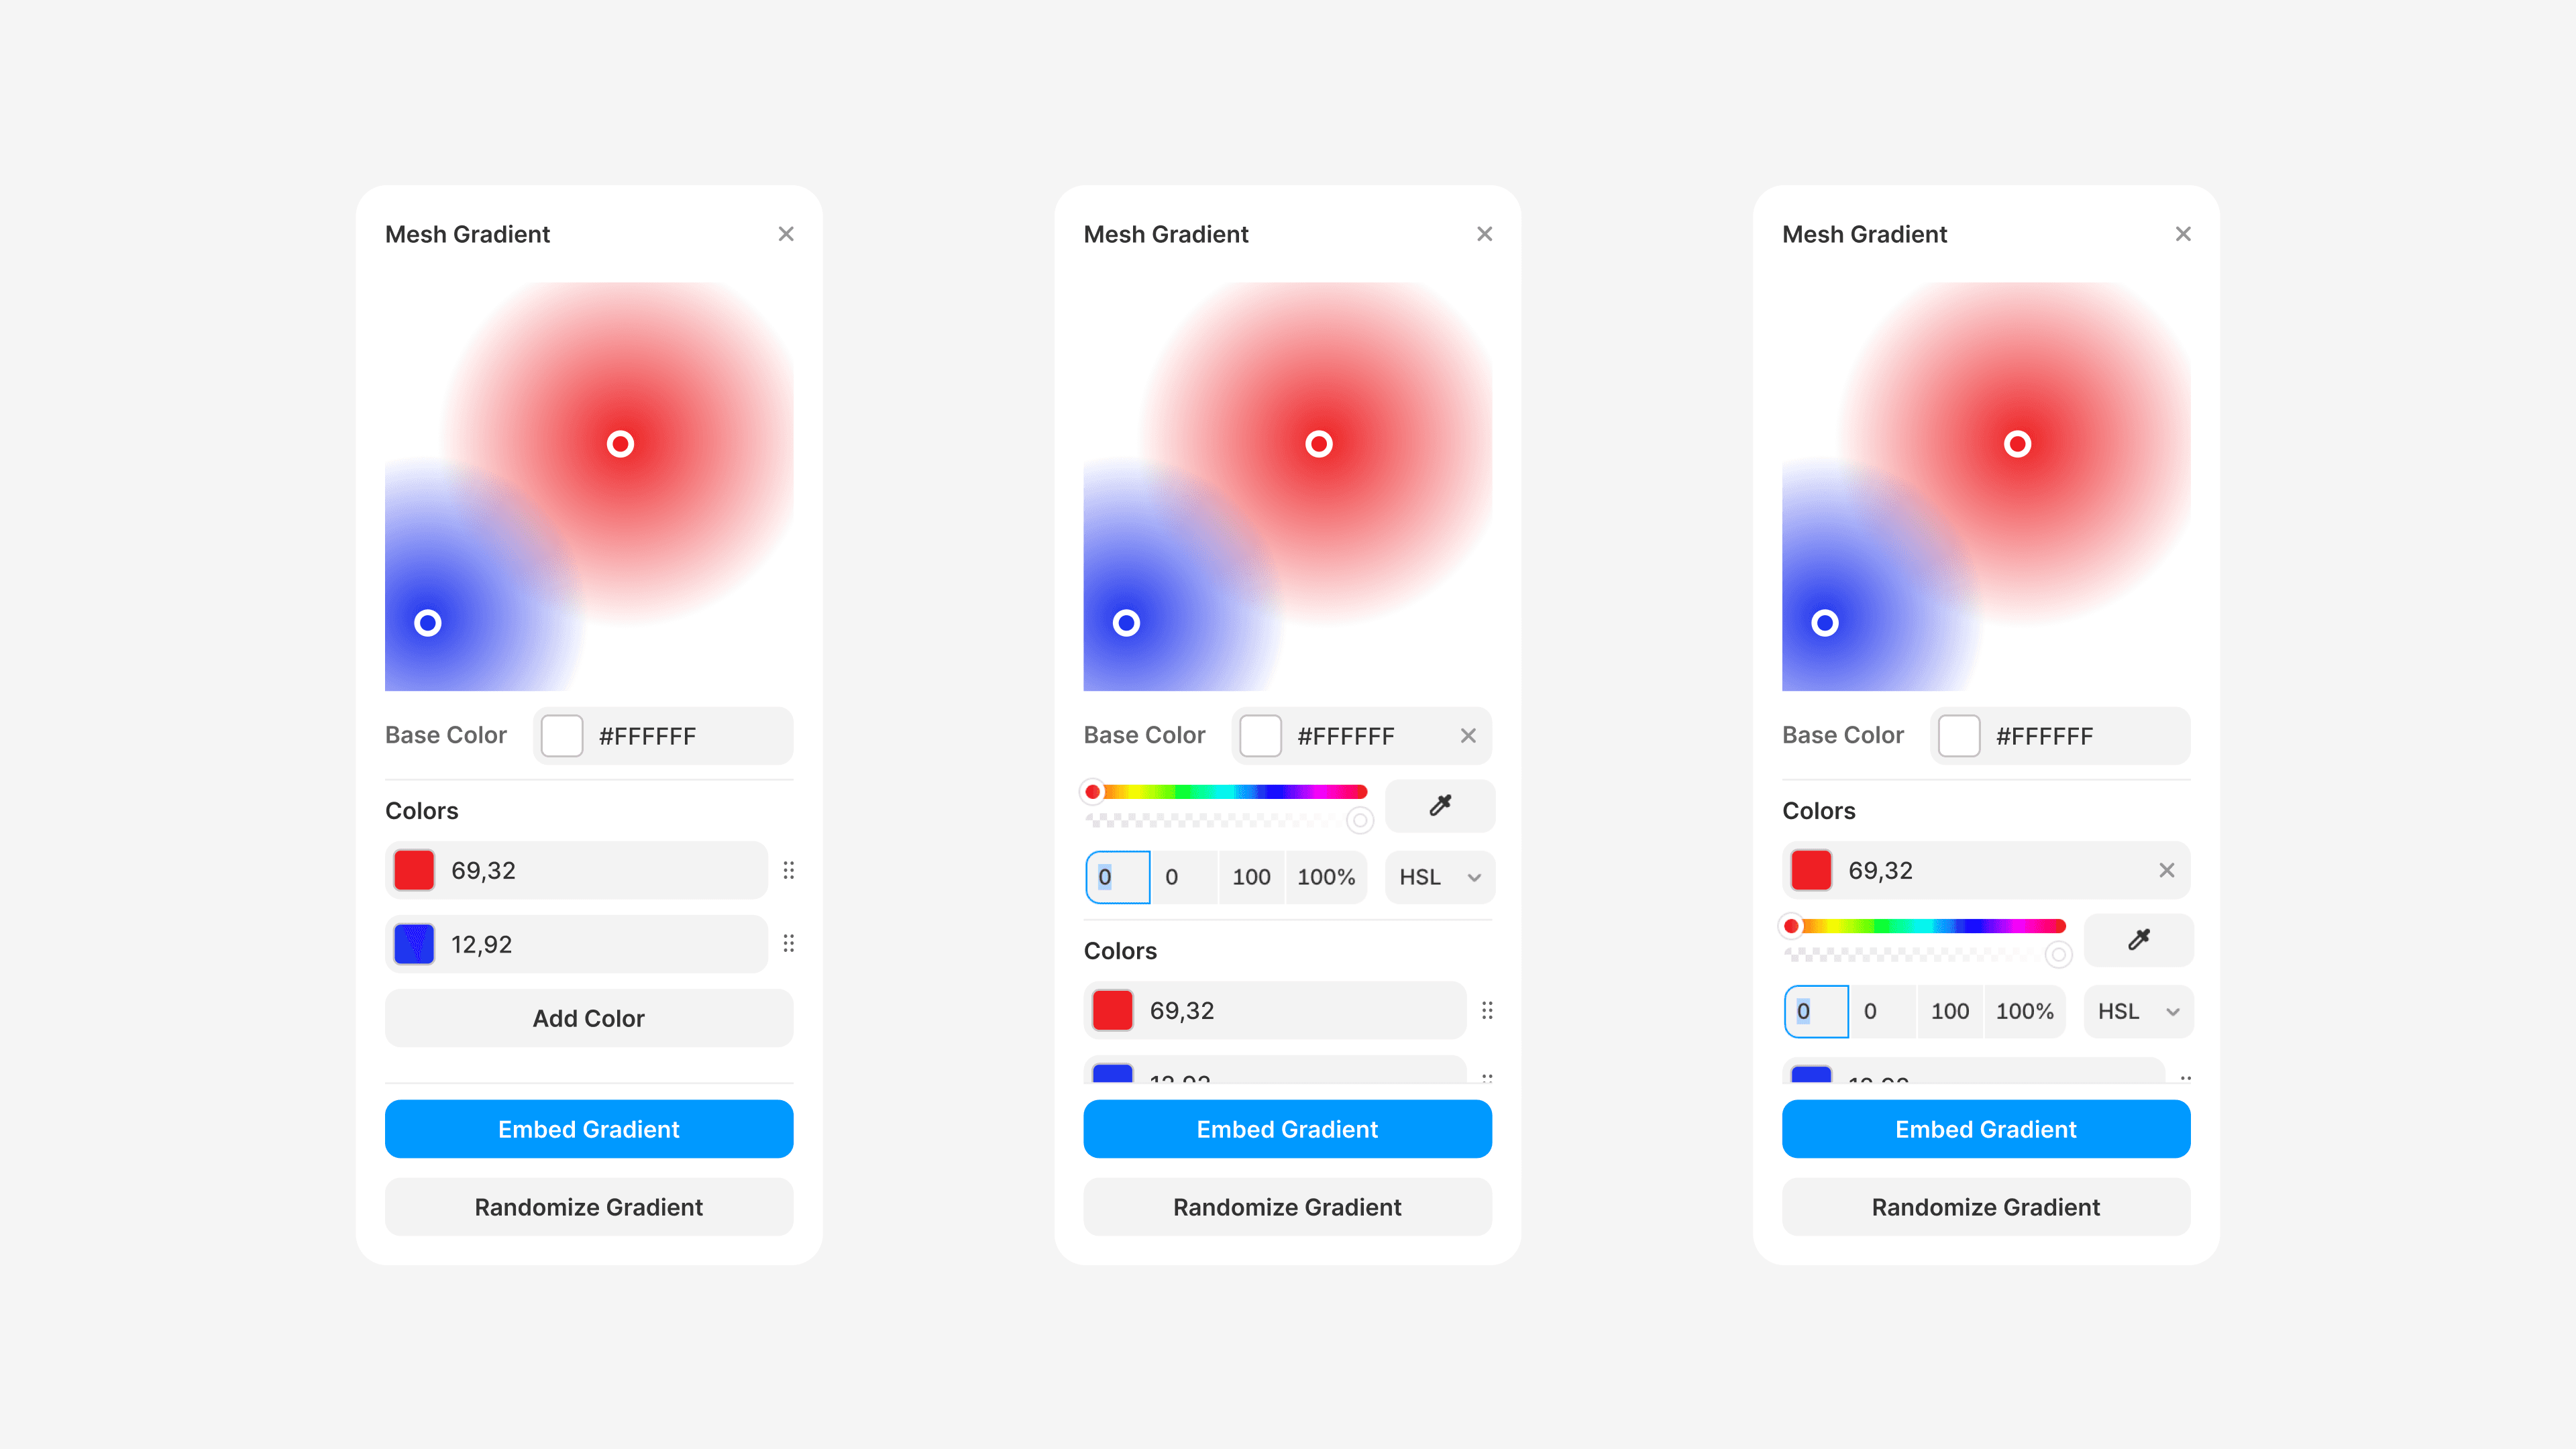
Now I needed a UI that designers would actually want to use. I designed the interface in Figma first, then worked with AI to implement it in React:
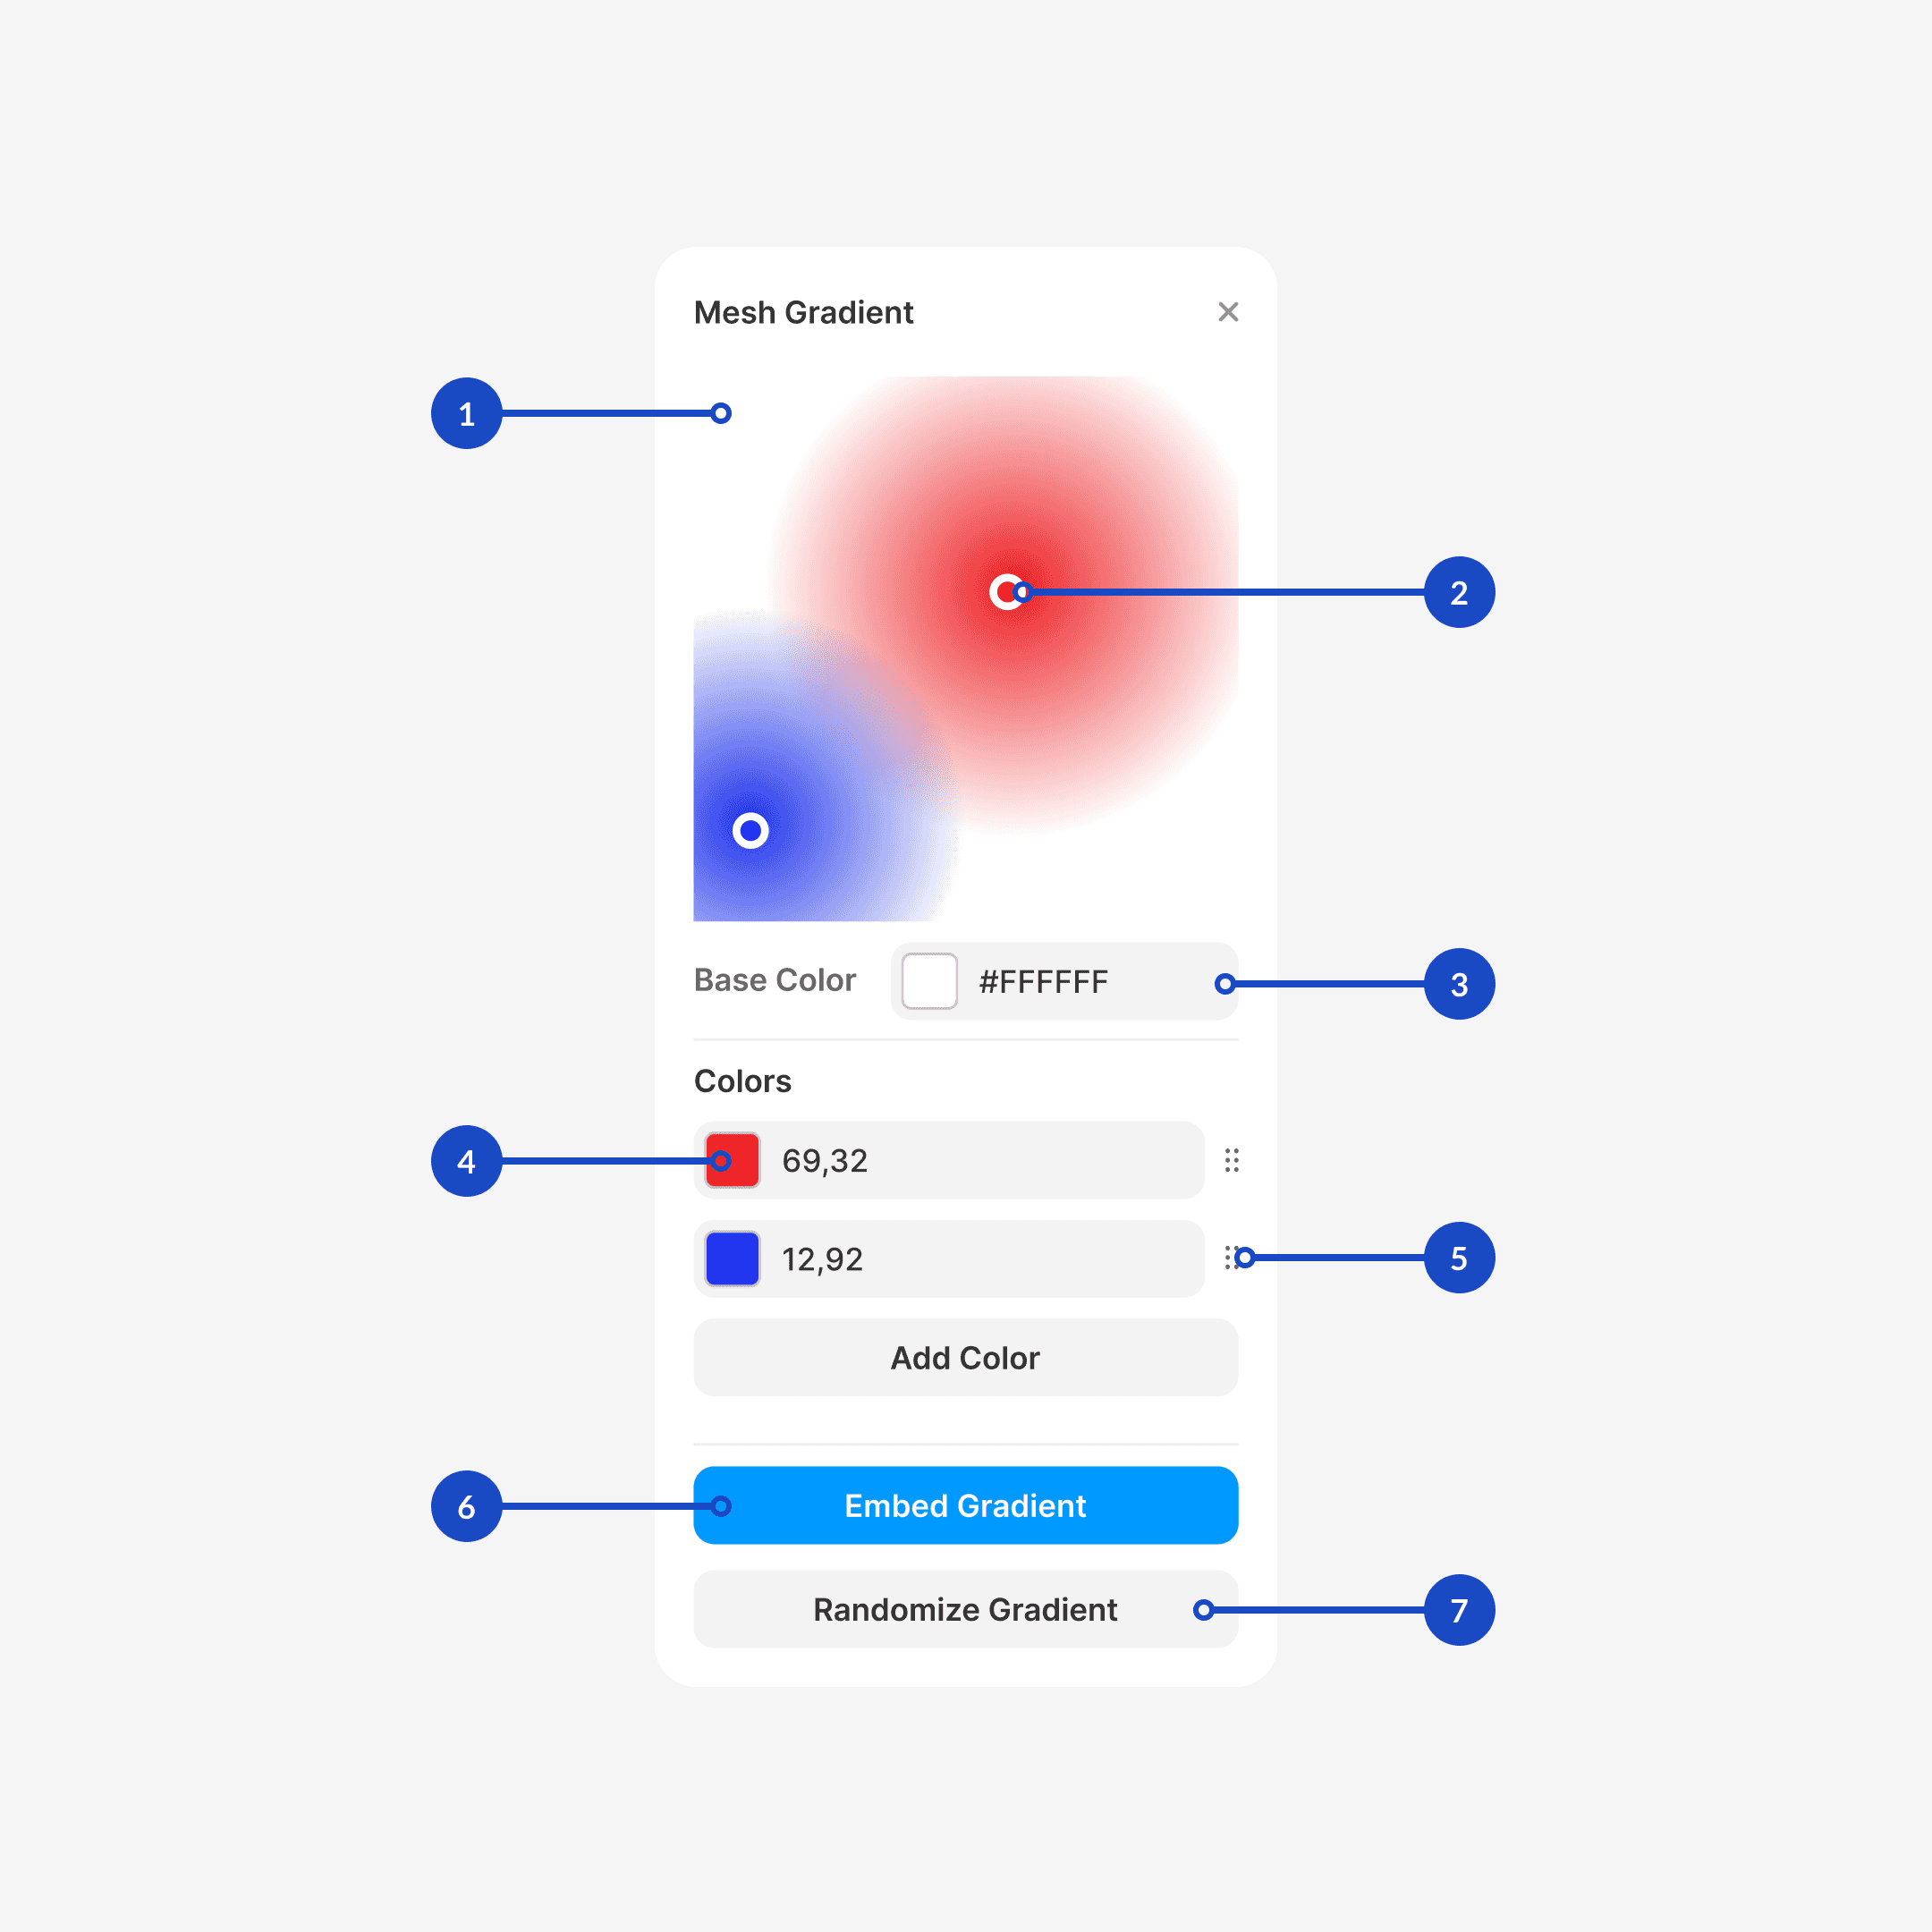
Key UI Elements:
Live preview canvas
Gradient point handles
Color picker for canvas color
Color pickers for for each color point
Re-orderable color controls (X, Y coordinates)
"Add to Canvas" action button
Randomize button for instant inspiration
Phase 4: Publishing and Iteration
I published version 1 to the Framer Marketplace with minimal features. The response was immediate: 1,000+ users in the first few weeks
Phase 5: The Monorepo Structure
As the codebase grew, I needed better organization. I asked AI to help me set up a monorepo (check it out on Github):
/packages/mesh-gradient- Core WebGL library published as a npm package/apps/framer-plugin- Framer plugin with UI controls/apps/demo- Standalone demo for testing outside Framer
This structure meant I could:
Test the core gradient logic independently
Use the same engine in both the component and plugin
Potentially publish the core library to npm for others to use
Try It Out
Framer Plugin: Mesh Gradient Maker on Framer Marketplace
React Component: Framer Component
Source Code: GitHub Repository
NPM Package: npm install mesh-gradient
What I Learned
Building this solo taught me that AI accelerates execution without replacing design judgment. I still had to identify the gap, define the vision, design the interface, make the architectural decisions, and iterate on user feedback. AI compressed the time between idea and shipped code. What might have taken months of learning WebGL from scratch became weeks of focused building.
The bigger lesson: designers who can ship real products, not just prototypes, have a fundamentally different kind of impact. This is the kind of work I want to keep doing.